
Skin GUI Guide
Use the CSGO GC Inventory Editor to browse, edit, and save skins without hand-editing inventory files.
This guide shows you how to use the CSGO GC Inventory Editor to edit your CS:GO inventory without doing everything by hand.
Initial Setup
When you launch the application for the first time, it will automatically prompt you to select your
inventory.txt file.
This file is located inside your CS:GO GC folder:
Browsing and Editing Items
The left panel displays your entire inventory. Click any item to view and edit its properties in the main editor window.
- Edit Properties: Change skins, floats, patterns, rarity, quality, and more.
- Live Preview: Some versions of the editor support instant previewing.
Adding and Removing Items
The editor includes the full CS:GO item database, allowing you to add anything:
- Weapons
- Knives
- Gloves
- Agents
- Pins
- Stickers
- Music Kits
- Cases and Keys
You can also remove unwanted or duplicate items with a single click.
Saving and Syncing
Once you're done editing:
- Save: Writes all changes to your
inventory.txt. - Reload Inventory: Refreshes the editor if you made changes in-game or manually edited the file.
Switching Inventory Files
If you want to edit a different inventory later, click the "Change file.." button in the top bar.
This makes it easy to switch between different accounts or setups.
Tips for Best Results
- Always keep a backup of your
inventory.txtbefore major changes. - Use the editor inside its own folder to avoid missing dependencies.
- If the game doesn't show your changes, restart CS:GO and reload the editor.
Screenshot
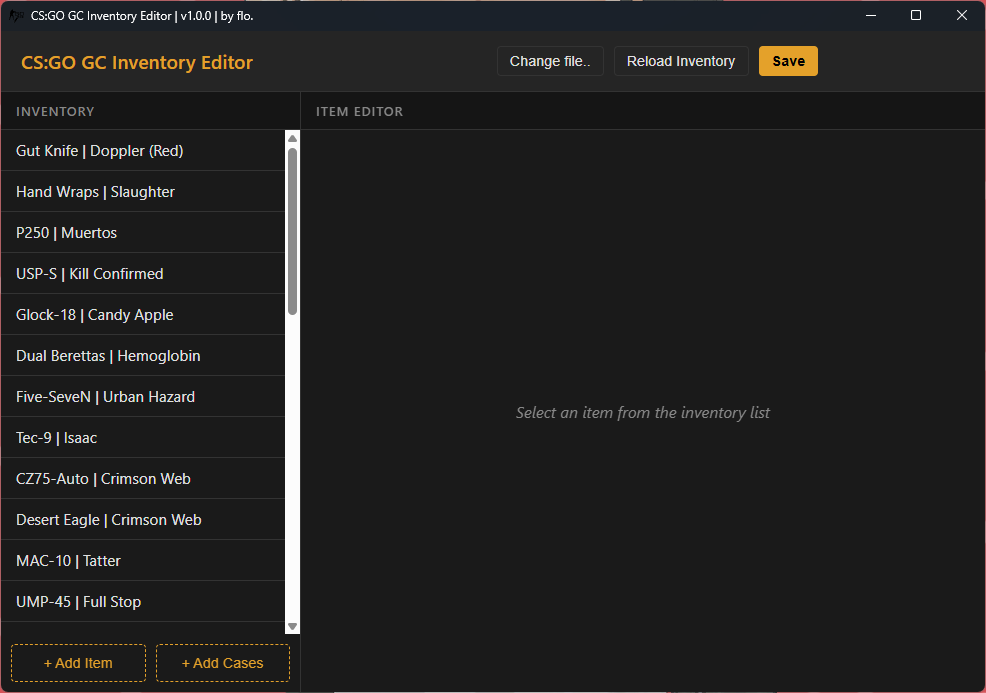
The tool is still improving, so expect more features over time.